Proper shaft alignment is a key issue on ships, especially on large vessels such as bulk carriers, tankers, container-ships and gas carriers. Any wrong alignment on the shaft can result in undesirable vibrations and higher operating costs. As a result there may be damages in stern tube bearings, propulsion system, M/E and eventually gear box.
The jack up test, enable us to determine the actual reaction in way of accessible bearing and verify their influence coefficients. The accessible bearings are the intermediate bearings and the forward or aft bush of shaft reduction gear always in relation to the shaft arrangement.
The procedure of jack up test has some limitations:
- Jack up tests can only measure what’s happening at the intermediate bearing and the engine coupling. But what we are really interested in is what’s happening in the stern tube. In particular, jack up tests tell us nearly nothing about the all important pressure distribution within the aft bearing.
- Jack up tests are completely static.
- Jack up tests are limited to a couple of conditions. The rules require only three conditions: in dock, cold along side at low draft, and one condition with the engine hot.
- Due to measurement errors and hysteresis effects, jack up tests are notoriously inaccurate and unrepeatable.
These limitations are of less important nowadays because the last twenty years, naval vessels have had their shafts aligned by dynamic strain gauging. The results are more accurate and can almost cover all the important system variables, and can be taken with the shaft operating for a large range of conditions including turning.
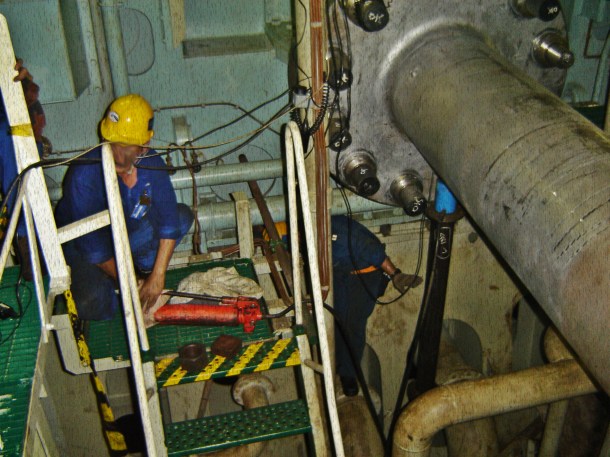
The required equipment is a dial gauge with magnetic support with an accuracy of 0,01mm and a total capacity of 3mm. The hydraulic jack is with a capacity of 20kN, a minimum stroke of 20mm and a set of filler gauges. The jack is positioned at the indicated positions.
During the lift of the shaft, it should not come in contact with the top part of the bearing. Also during the lift of the shaft, it should not come in contact with any metallic part of a shaft accessory as shaft seal, bulkhead seal, etc.
The jack is always placed below the shaft. The dial gauge is placed above the shaft, opposite to the jack at 12 o’ clock.
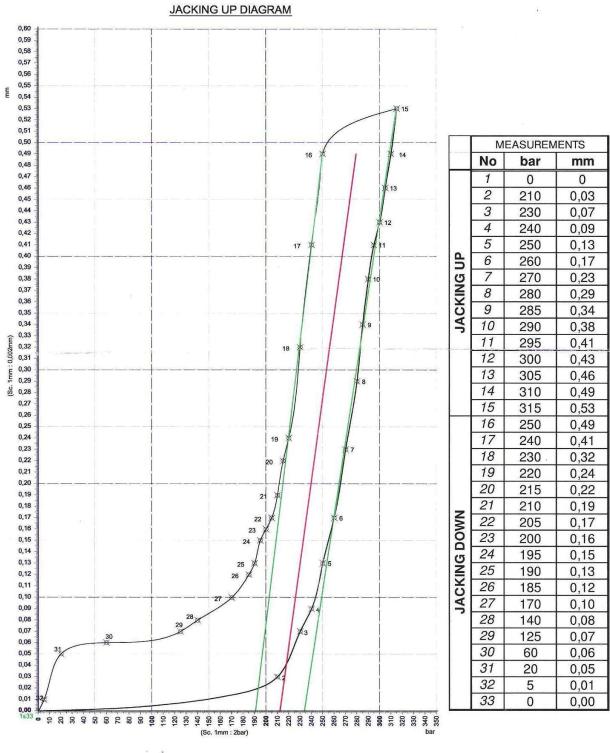
First of all, it is wise to perform an initial lifting to the shaft in order to establish oil film between shaft and bearing surface before reading the results. We adjust the dial gauge to zero. We jack up the shaft by steps of 0,01 up to 0,3mm for jack load 1 and up to 0,1mm for jack load 2. At each step, we record the lift and the load at the jack. We pull the shaft down by steps corresponding to the reverse direction of jacking up to zero position. At each step we record the indication of the dial gauge and the load on the jack. Finally we put all the data measurements to a table so as to draw the graph.


Leave a Comment